
Health
What Causes Ankle Arthritis and Why It Develops Over Time

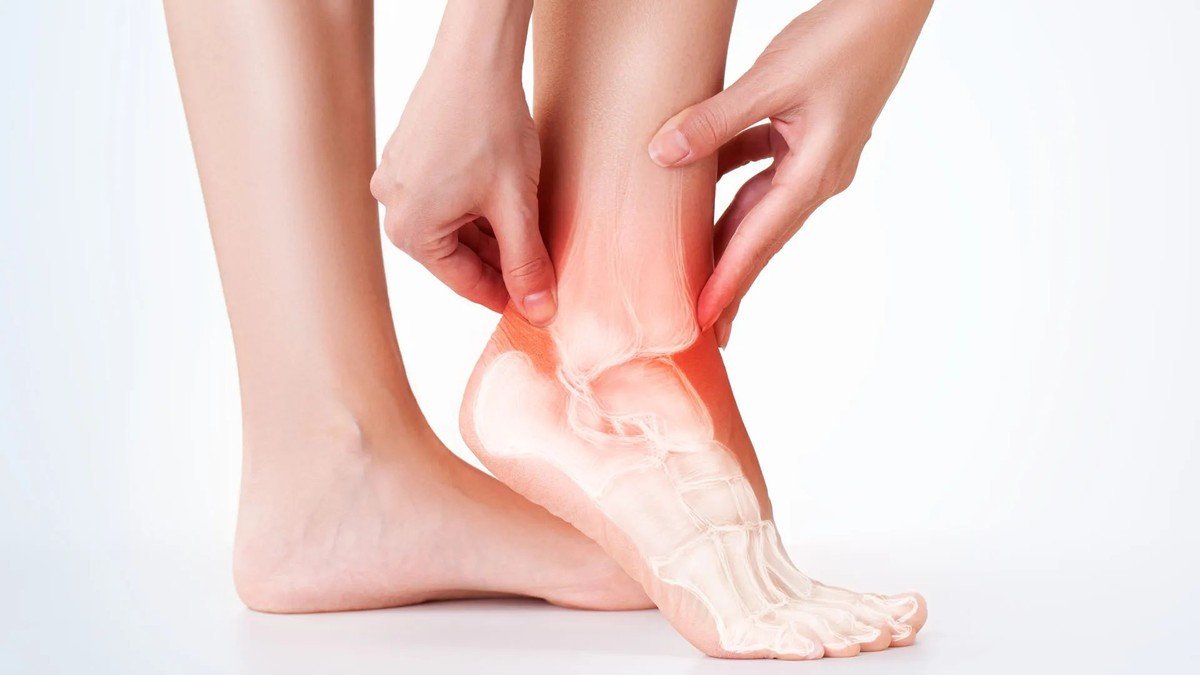
Ankle arthritis is a condition where the cartilage within the ankle joint gradually wears down, leading to pain, stiffness, and reduced movement. Unlike some other joints in the body, the ankle is not commonly affected by age-related wear alone. In many cases, ankle arthritis develops as a result of previous injury or ongoing mechanical stress placed on the joint over time.
The condition may develop slowly, with symptoms becoming more noticeable as joint changes progress. Understanding the causes and progression of ankle arthritis can help individuals recognise early symptoms and seek appropriate medical attention when needed.
Understanding the Ankle Joint
Structure and Function of the Ankle
The ankle joint is formed by the tibia, fibula, and talus bones. It is responsible for supporting body weight and allowing movement such as walking, running, and jumping. The smooth cartilage covering the ends of these bones helps reduce friction and allows the joint to move smoothly.
When cartilage is damaged or wears down, the bones may begin to rub against each other, leading to pain and inflammation.
Importance of Cartilage in Joint Movement
Cartilage acts as a protective layer within the joint. It helps absorb shock and ensures smooth movement during daily activities. Once cartilage is damaged, it does not regenerate in the same way as other tissues in the body, which is why joint changes may progress over time.
Common Causes of Ankle Arthritis
Previous Ankle Injuries
One of the most common contributing factors to ankle arthritis is a previous injury. This may include fractures, ligament injuries, or repeated ankle sprains. These injuries can affect joint alignment or damage cartilage, increasing the likelihood of long-term joint changes.
Even after recovery from an initial injury, subtle changes in joint mechanics may continue to place stress on the ankle.
Repetitive Stress on the Joint
Activities that involve repeated impact on the ankle joint may contribute to gradual wear and tear. This may include running, jumping, or occupations that require prolonged standing or walking.
Over time, repetitive loading may place stress on cartilage and supporting structures, contributing to gradual joint changes.
Joint Misalignment
Changes in bone alignment following injury or structural differences in the foot and ankle can lead to uneven distribution of weight across the joint. This imbalance may place additional stress on certain areas of the cartilage, contributing to degeneration over time.
Inflammatory Joint Conditions
Certain inflammatory conditions affecting the joints may also contribute to ankle arthritis. These conditions may cause ongoing inflammation within the joint lining, which can affect cartilage health and joint function over time.
How Ankle Arthritis Develops Over Time
Early Stage Changes
In the early stages, ankle arthritis may not cause significant symptoms. Mild stiffness or occasional discomfort after activity may be noticed, especially after long periods of standing or walking.
At this stage, cartilage damage may already be present but not severe enough to cause constant pain.
Progressive Cartilage Wear
As the condition progresses, cartilage within the joint continues to thin. This reduces the joint’s ability to absorb shock, leading to increased friction between bones. This may result in more frequent pain, swelling, and stiffness.
Changes in Walking Pattern
As discomfort increases, individuals may unconsciously adjust the way they walk to reduce pain. These changes in movement may place additional stress on surrounding joints such as the knee or hip.
Advanced Joint Changes
In later stages, cartilage loss may become more significant, and bone surfaces may begin to rub directly against each other. This may lead to persistent pain, reduced mobility, and difficulty performing daily activities such as walking on uneven surfaces or climbing stairs.
Symptoms of Ankle Arthritis
Persistent Joint Pain
Pain in the ankle joint is a common symptom and may worsen with activity or prolonged weight-bearing.
Stiffness and Reduced Mobility
Stiffness may be more noticeable in the morning or after periods of rest. Movement of the ankle may feel restricted.
Swelling Around the Joint
Inflammation within the joint may lead to swelling, particularly after activity.
Difficulty with Movement
As the condition progresses, individuals may find it more difficult to perform activities such as walking long distances, running, or standing for extended periods.
When Medical Assessment May Be Considered
Medical assessment may be appropriate if ankle pain persists over time, especially if it affects daily activities or mobility. Individuals who experience recurrent swelling, stiffness, or difficulty bearing weight may also benefit from evaluation.
Early assessment may help identify the underlying cause of symptoms and guide appropriate management options based on the severity of the condition.
Management Approaches for Ankle Arthritis
Activity Modification
Reducing high-impact activities may help decrease stress on the ankle joint. Low-impact exercises may be recommended to maintain mobility.
Physiotherapy
Targeted exercises may help improve joint movement, strengthen surrounding muscles, and support joint stability.
Supportive Devices
In some cases, braces or orthotic support may help reduce stress on the ankle during movement.
Medical and Surgical Options
Depending on the severity of the condition, medical treatments or surgical options may be considered to manage symptoms and improve joint function.
Ankle arthritis develops gradually due to a combination of previous injury, repetitive stress, joint misalignment, and inflammatory processes. Over time, cartilage within the ankle joint wears down, leading to pain, stiffness, and reduced mobility.
Recognising early symptoms and understanding risk factors can help individuals seek timely medical assessment and appropriate management to support joint health and daily function.


Getting a lifeguard certificate is not just about having another qualification on your resume. It shows that you have learned how to recognize danger, respond to emergencies, and help keep people safe around water.
But what does a Lifeguard Certification actually teach?
From water rescue and surveillance to CPR/AED and First Aid, a good certification course covers much more than swimming. It prepares you for situations where quick thinking and the right response can make a real difference.
What Does Lifeguard Certification Cover?
A lifeguard certification course usually combines safety knowledge with practical lifeguarding skills. The goal is to prepare you for real aquatic emergencies, not simply help you pass a test.
Core areas may include:
- Water surveillance
- Recognizing swimmers in distress
- Water rescue
- CPR/AED
- First Aid
- Emergency response
- Injury prevention
- Communication and teamwork
- Professional lifeguard responsibilities
The American Lifeguard Association also describes its training around lifeguarding, CPR/AED, First Aid, and injury prevention. Its current program uses a video instructor-led blended learning format.
The Skills Behind the Certificate
A certificate has value because of the skills behind it.
Water Surveillance
A lifeguard must stay focused while watching the water. This means scanning the assigned area, noticing unsafe behavior, and identifying swimmers who may need help.
Drowning does not always look dramatic. A person in trouble may not be able to shout or wave. Good surveillance helps a lifeguard notice a problem early.
Water Rescue
Water Rescue is one of the most important parts of lifeguard training. Students learn how to approach a person in distress, use rescue equipment, support the victim, and remove them from the water safely.
The focus is not only on rescuing someone. It is also on protecting the lifeguard during the rescue.
Emergency Response
Lifeguards need to know what to do when an emergency happens. Training helps them understand emergency procedures, communicate with their team, and respond without unnecessary delay. That preparation can make a stressful situation easier to manage.
Why CPR/AED and First Aid Matter
A lifeguard may be the first trained person available when an emergency occurs. That is why CPR/AED Certification and First Aid Training are important parts of professional lifeguarding.
CPR helps provide immediate care during a cardiac or breathing emergency. AED training teaches lifeguards how to use an automated external defibrillator when appropriate. First Aid prepares them to respond to injuries and other common emergencies.
ALA includes CPR/AED and First Aid within its lifeguard certification pathway.
Practical Training vs. Theory
Knowing the correct answer on a test is not enough for lifeguarding. A lifeguard needs to apply that knowledge in a real aquatic environment. That means understanding how to scan the water, use rescue equipment, respond to a victim, and work with other staff.
This is why practical readiness matters alongside classroom or online learning. The American Lifeguard Association uses a blended learning approach. Its materials explain that academic instruction can be completed through video instructor-led training, while practical competency and facility-specific readiness are addressed through employer-based processes.
Choosing the Right Lifeguard Certification Course
Not every learner has the same goal. Before choosing a Lifeguard Course, look at what the program actually covers.
Consider these questions:
- Does it include CPR/AED and First Aid?
- Does it teach real water rescue skills?
- Does it cover prevention and emergency response?
- Is the certification easy for employers to verify?
- Does the course fit the type of aquatic environment where you want to work?
A good program should prepare you for responsibility, not just give you a certificate.
Keeping Your Certification Current
Lifeguarding skills need regular practice. A certification should not be treated as something you earn once and forget.
According to ALA, its successful participants receive Lifeguarding, CPR/AED, and First Aid certifications that are valid for two years. ALA also provides a recertification pathway for returning lifeguards. Staying current helps you maintain confidence and readiness when an emergency occurs.
5 FAQs About Lifeguard Certification
1. What is Lifeguard Certification?
It is a credential showing that a person has successfully completed the required training and certification process for lifeguarding. It covers areas such as water rescue, emergency response, CPR/AED, and First Aid.
2. What do you learn in lifeguard training?
Lifeguard Training can include surveillance, victim recognition, water rescue, CPR/AED, First Aid, emergency procedures, injury prevention, and teamwork.
3. Does lifeguard certification include CPR and First Aid?
Yes. ALA states that its lifeguard program includes Lifeguarding, CPR/AED, and First Aid certification.
4. How long is ALA certification valid?
ALA states that its Lifeguarding, CPR/AED, and First Aid certifications are valid for two years.
5. Can I renew my lifeguard certification?
Yes. ALA states that lifeguards can renew their certification through a recertification course before their current certification expires.
Conclusion
A Lifeguard Certification is more than a piece of paper. It represents training, practical skills, emergency knowledge, and responsibility.
The right Lifeguard Certification Course can help you understand what to look for, how to respond, and how to stay prepared. With proper Lifeguard Training, you are not simply learning how to rescue someone. You are learning how to help prevent emergencies in the first place.
For anyone preparing for a career in aquatic safety, choosing a reliable training provider is an important first step. The American Lifeguard Association offers certification and training options designed around these essential skills.
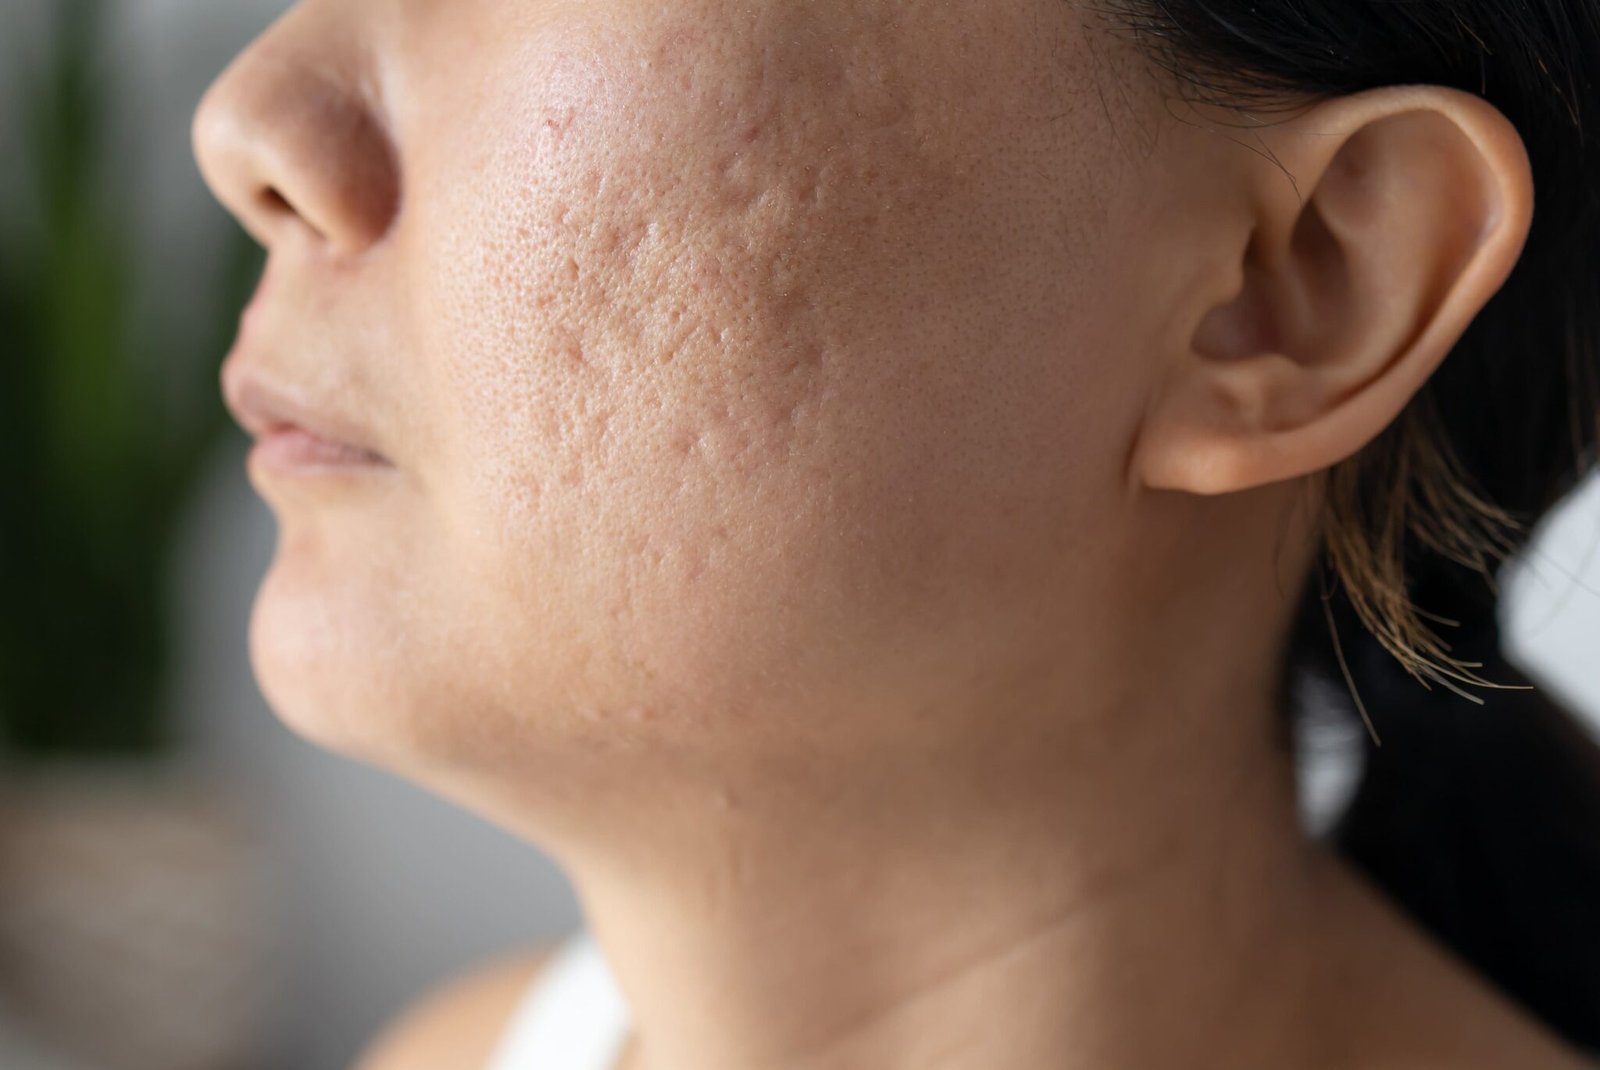
Laser or microneedling? Patients considering these two popular treatments typically begin by looking at the price, only to find that cost and outcomes involve far more than a number on a clinic menu. A lower fee per visit might hide a longer plan while a higher fee might buy fewer sessions but stronger improvement.
The acne scar removal cost in Singapore is very different as it is contingent upon the method that a doctor recommends. Both lasers and microneedling rebuild scarred skin by triggering collagen, but differ in depth, downtime, number of sessions and price. This guide compares the two so you can match your budget to a treatment that works for your scars.
How Each Treatment Works
Laser Resurfacing
Fractional lasers produce thousands of tiny controlled heat columns in the skin. The body reacts by fixing that tissue and creating new collagen which little by little smooths texture and softens scar edges. Ablative lasers remove thin layers of skin and yield more powerful results with a longer recovery. Non-ablative lasers heat the tissue below the surface and require less downtime.
Microneedling
Microneedling is the process of puncturing the skin with tiny needles. These micro-injuries induce the body to produce new collagen without heat. Many clinics will incorporate radiofrequency energy, which sends heat deeper for firmer and smoother results. Some use needling with serums or platelet-rich plasma to speed healing.
Cost Per Session: Comparing Your Price
Laser Costs
Lasers tend to be more expensive per visit. The devices are expensive to buy, calibrate and maintain, and ablative or advanced fractional systems are at the upper end of the range. Prices also rise with the area treated, a cheek costing less than a full-face plan.
Microneedling Cost
Basic microneedling tends to be cheaper per session, which is attractive to many first-time patients. The price increases with radiofrequency microneedling and add-ons like growth factor serums or platelet-rich plasma. Always ask what is included in a quoted fee before you compare it with another clinic.
Total Cost: How Sessions Change the Equation
Laser Therapy
Most laser programs need three to five sessions, separated by four to eight weeks. More potent ablatives may offer visible change with fewer visits. Deep or severe scars still require additional sessions or combined treatments.
Treatment with Microneedling
Since microneedling is less aggressive, most patients will require four to six sessions, and more for deeper scars. Collagen builds up and results develop slowly. A much lower price repeated many times can meet or even out-price a shorter laser course.
Side-by-Side Comparison
How the two options measure up on the factors that matter most:
- Price per session: Lasers are more expensive, microneedling is less expensive.
- Number of sessions: Lasers generally require less treatments while microneedling usually requires more.
- Best for: Lasers work well for boxcar scars and uneven texture, while microneedling is best for shallow and rolling scars.
- Downtime: Lasers leave you red and peeling for several days; microneedling usually resolves in two to four days.
- Skin tone safety: Microneedling is safer for pigment, while heat-based lasers warrant extra caution with deeper skin tones.
- Results: Microneedling generally leads to slower improvements, while lasers usually result in bigger changes per session.
Find the Right Treatment for Your Scar Type
Ice-Pick and Boxcar Scars
Microneedling is not sufficient for more serious scarring. For boxcar scars fractional lasers do a good job. For ice pick scars you may need to treat them individually with something like TCA CROSS.
Rolling Scars
Rolling scars occur when bands of tissue pull the skin down. Doctors frequently combine subcision with microneedling or lasers to release the tension and rebuild collagen.
Post-Inflammatory Pigmentation
Mild options work well on flat red or brown marks. A light laser toning or brightening serum microneedled into the skin may do the trick, and they’re cheaper than aggressive resurfacing.
Darker Complexions
Those with darker skin tones are more susceptible to pigment changes following heat-based treatment. Microneedling or well adjusted lasers are usually the safer option.
Additional Costs Outside of Treatment
Consultation fees, numbing cream and follow-up visits may sit outside the headline price. Sunscreen, barrier repair creams and prescribed topicals should be reapplied regularly to protect healing skin.
More aggressive treatments may require taking time off work, which is a cost in itself. Packages can reduce the fee per visit, but check expiry dates and refund terms before you pay.
Risks to Consider Before Selecting a Treatment
Both ways can be dangerous if not handled properly. Incorrect laser settings may cause burns, scarring or uneven pigmentation. Practitioners warn that without proper hygiene, aggressive microneedling can lead to infection or irritation. It means a good doctor can lower these risks, which is why paying more can sometimes be a better deal. Getting it right the first time saves you a lot of money.
Selecting Within Your Budget
Get a proper diagnosis. The wrong type of scar is a waste of money to treat. Get a written estimate from each clinic for the full course, the device in use and the expected number of sessions. Be wary of big discounts and the pressure to pay up front for large packages.
Many patients seeking honest, skin-first advice turn to practices like Bio Aesthetic Clinic where trained practitioners assess scar type, depth and skin sensitivity before recommending a laser, micro-needling or a combination. This way you keep costs and results in balance instead of being driven to the most expensive option.
Verdict: Pick the Treatment That’s Right for Your Scars
Lasers are more expensive per session but tend to be more powerful change in less visits. Microneedling is cheaper upfront and good for superficial scars and sensitive skin, but you may need more treatments. The final decision should be based on your scar type, skin tone, timeline and budget.
Book a consultation, request a written plan and compare full course costs rather than single visit prices. With the right information and a qualified provider, you can make smart choices and move toward smoother skin.
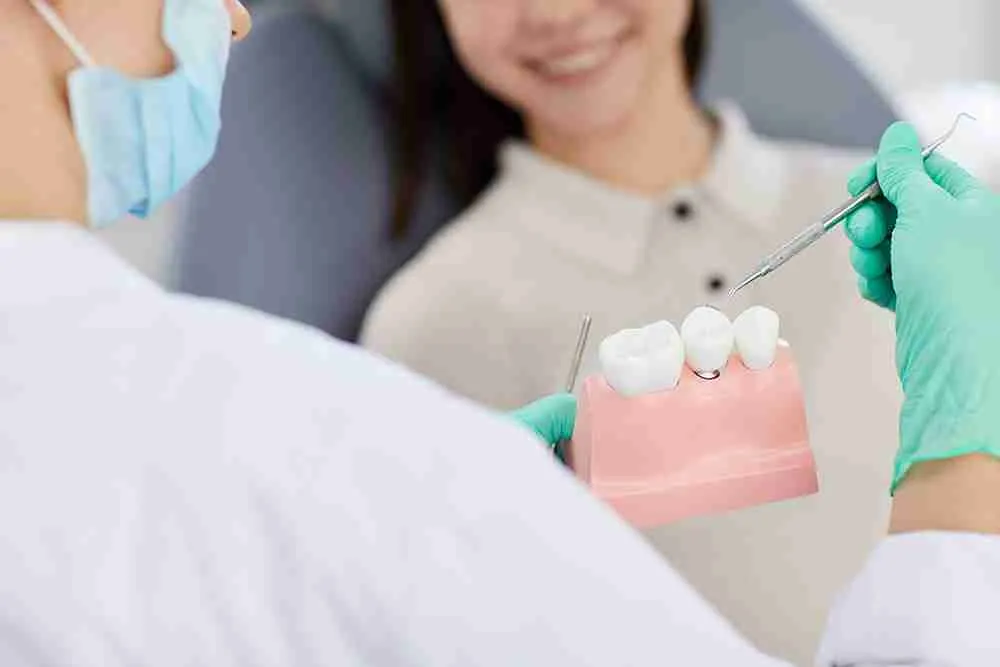
Few things make people postpone a dental visit faster than uncertainty about the bill. A simple toothache can turn into a three-figure surprise, and nobody wants to find out at the counter. Cheap clinics tempt you with low advertised prices, premium clinics seem to justify high ones, and the truth sits somewhere between the two.
If you’re searching for affordable dental in Bedok, the goal isn’t finding the lowest number. It’s understanding what a fair price looks like for each treatment, what drives costs up, and which subsidies can bring them down. This guide gives you realistic price ranges, explains the factors behind them, and shows how to protect both your teeth and your wallet.
What “Affordable” Really Means in Dentistry
Price Versus Value
A low quote can look attractive until you learn it excludes X-rays, materials, or follow-up visits. Affordable care means paying a fair price for work done well, not paying the least for work you’ll need to redo. A filling that fails in a year costs more than one priced slightly higher that lasts a decade.
Why Prices Vary Between Clinics
Dentist experience, materials, equipment, clinic location, and the complexity of your case all shape the final fee. A molar root canal takes longer than a front tooth, and a cracked tooth costs more to restore than a small cavity. That’s why itemised quotes matter so much.
Typical Costs for Everyday Treatments
Using MOH Fee Benchmarks as a Reference
Singapore’s Ministry of Health publishes fee benchmarks for 18 common procedures covered under CHAS. These serve as helpful reference points when you’re judging whether a quote is reasonable. For example, benchmarks put scaling at roughly S35toS60 and a simple filling at S65toS160, with complex fillings at S80toS180. Private clinics outside the CHAS framework often charge more, with scaling and polishing commonly in the S100toS150 range and composite fillings varying by tooth and size.
Root Canals, Crowns, and Extractions
Root canal treatment shows the widest spread because it depends on which tooth is involved. MOH benchmarks list anterior teeth at about S400toS775, pre-molars at S500toS900, and molars at S872toS1,400. A crown to protect the treated tooth is a separate cost, and published figures commonly run from roughly S800towelloverS1,000 depending on material. Wisdom tooth surgery varies enormously, from a few hundred dollars for a straightforward case to well over a thousand for an impacted tooth needing a specialist.
These are reference ranges, not guarantees, so always confirm the exact fee for your case.
How Subsidies Cut the Bill
CHAS Support for Singapore Citizens
CHAS subsidies reduce the cost of many basic and preventive procedures, including scaling, fillings, and extractions, as well as restorative work such as root canal treatment and crowns at participating clinics. Enhancements rolled out from late 2025 extended support to CHAS Orange cardholders and raised subsidy caps for restorative treatment. The subsidy is deducted at the clinic, so you only pay the balance. Check your tier and balance through the MY CHAS portal before your appointment.
Medisave and Flexi-MediSave
Medisave generally covers surgical procedures such as wisdom tooth surgery and implant placement at accredited clinics, within Ministry of Health limits, but not routine checkups, scaling, or fillings. From mid-2026, eligible seniors aged 60 and above can also use Flexi-MediSave, up to S$400 a year, toward root canal treatment and permanent crowns at eligible clinics.
Where Your Money Goes: A Quick Comparison
Different treatments fall into different cost brackets, which helps you plan:
- Preventive care (checkups, scaling): Lowest cost, highest long-term value, and the easiest to keep affordable through regular visits.
- Restorative care (fillings, root canals, crowns): Mid-range costs that rise sharply when problems are left untreated.
- Replacement and cosmetic care (implants, braces, whitening): The highest costs, often with limited subsidy, so careful planning matters.
Smart Ways to Keep Costs Down
Prevention Is the Cheapest Treatment
A cleaning every six months costs far less than a root canal and crown. Small cavities caught early need simple fillings, while ignored ones can end up needing thousands in treatment. Skipping checkups to save money usually backfires.
Ask for an Itemised Quote
Request written estimates for anything beyond a routine visit. Ask what’s included, such as X-rays, anaesthesia, materials, and follow-ups, and whether prices change if complications arise. Comparing two or three quotes helps you spot outliers.
Discuss Alternatives
Ask your dentist whether there are different ways to treat the same problem. A filling might delay the need for a crown, or a bridge might suit your budget better than an implant. A good dentist explains trade-offs without pressure.
Questions Worth Asking Before You Pay
Ask what the full cost will be including follow-ups, which CHAS or Medisave amounts apply, and what happens if the treatment needs adjustment later.
Warning Signs of “Too Cheap”
Be cautious if a clinic refuses to put prices in writing, pushes treatments you don’t understand, or advertises a price far below typical ranges without explaining what’s included. Hygiene shortcuts are another red flag. Check that instruments come from sealed pouches and that staff follow clear infection control routines.
Choosing a Clinic That Is Upfront About Costs
Transparency is the strongest indicator of fair pricing. Practices such as Nuffield Dental, which is accredited for Medisave claims and explains which portions of surgical treatment are claimable, show how openness about fees and subsidies helps patients plan before committing. Whichever clinic you consider, look for that same clarity, and always request a written treatment plan before agreeing to anything.
Key Takeaways
Quality dental care doesn’t have to be financially stressful. Use MOH fee benchmarks as your reference point, claim every subsidy you’re eligible for, keep up with regular checkups, and insist on itemised quotes before any major treatment. When you focus on value rather than the lowest price, finding affordable dental in Bedok becomes far more manageable, and your teeth stay healthy without surprise bills along the way.

What Your Coffee’s Flavour Notes Are Actually Telling You

How donations support daily care at a Romanian dog shelter

Buying Bedroom Furniture Built To Last

Who Is Shameera? All You Need To Know About Charli XCX’s Mother

Who Is Gulliver Flynn Oldman? The Untold Story of Sir Gary Oldman’s Son

Meet Rosemary Turner: The Mother of Actor Callum Turner
-
Biographies8 months ago
Who Is Shameera? All You Need To Know About Charli XCX’s Mother
-
Biographies8 months ago
Who Is Gulliver Flynn Oldman? The Untold Story of Sir Gary Oldman’s Son
-
Biographies9 months ago
Meet Rosemary Turner: The Mother of Actor Callum Turner
-

 Biographies7 months ago
Who is Alexandra James? Inside The Life of Jeremy Clarkson’s Former Partner
-
 Biographies8 months ago
Who is Todd McRae? Meet Tate McRae’s Father
-
 Biographies8 months ago
Who Is Daniel Mara? The Untold Story of Kate Mara’s Private Sibling
-
 Celebrity9 months ago
Who Is Peter Hernandez? The Real Story of Bruno Mars’ Father
-
 Biographies8 months ago
Who Was Adrian Mayers? The Untold Life of A$AP Rocky’s Late Father